

Last Updated on February 23, 2025 by Melissa Reome
This post is sponsored by Omaha Steaks. Rest assured all opinions are my own.
Cooking pork chops is not difficult with a little guidance. I will show you how to basics of how to cook pork chops so they come out perfect every time. Whether you grill them, cook on the stove, bake them in the oven or cook them sous vide, pork chops are delicious even when minimally seasoned. Pork chops are unfortunately frequently overcooked which leaves them dry and tough. Today we have access to many tools that can ensure we get great results every time. Once you know the basics you can dive into recipes that are more involved. But I’d like to get back to the basics first.
Types Of Pork Chops
Berkshire Pork Vs Regular Pork
Berkshire pork is a heritage breed known across the globe for being tender, flavorful, and juicy. Many consider Berkshire to be the Wagyu of pork. Berkshire pork is more red in color compared to traditional pork. The higher amount of intramuscular fat compared to traditional pork is what makes it more tender and flavorful.
Unless you are fortunate enough to have a butcher carrying higher end meat, you might be unfamiliar with Berkshire pork. Omaha Steak’s Berkshire Pork is raised on small family farms in the Midwest United States. The Berkshire pork chops I am using from Omaha Steaks are nice and thick and weigh in at 12oz each.

Is Berkshire Pork Better?
The short answer is yes, Berkshire pork is better than regular pork. It is more tender and flavorful comparatively speaking. I believe it is worth the extra cost to purchase a superior product. We look at different grades when buying beef and will pay a premium for a better cut. This can be applied to pork as well. Years ago buying a superior type of pork wasn’t commonplace but that is not the case today.
How To Cook Berkshire Pork Chops
Berkshire pork chops can be cooked just like traditional pork chops. As long as you keep an eye on the internal temperature of the pork, the breed of pork is irrelevant to the method of cooking.
Desired Internal Temperature
Regardless of the method you choose to cook pork chops, the internal temperature should be 145ºF when finished cooking. Please note, although pork chops, pork loin, pork tenderloin and pork roasts are fully cooked at 145°F, not all cuts of pork are. Ground pork must be cooked to 160°F. Cuts used for BBQ such as pork shoulder/pork butt/Boston butt for pulled pork are cooked until a much higher temperature until the meat is tender. The important thing to remember here is 145ºF is the proper finished temperature for pork chops.
Pork Chops, How Long Do I Cook Them?
The length of time you cook a pork chops depends on a number of factors. Which method are you cooking it? How thick is the pork chop? Is it a boneless or bone-in pork chop? The time will vary depending on these factors. One thing is constant however and that is the finished temperature for pork chops of 145°F. Thinner pork chops can be fully cooked in under 10 minutes but thicker chops will take longer.
For Guaranteed Success, Invest In A Reliable Instant Read Thermometer
The single most important thing you can do to guarantee success when cooking pork or any other meat for that matter, is buy a good instant read thermometer. I have been using either a Thermoworks Thermapen for many years. They are the most reliable instant read thermometers I have ever owned. Prior to buying my first Thermapen, I was constantly buying new ones as ones as every one I had would break or give readings that were inaccurate.

Methods To Cook Pork Chops
Although there are a wide variety of ways to cook pork chops, I will cover those most frequently used.
- How to grill pork chops
- How to cook pork chops on the stove
- How to cook pork chops in the oven
- Sous vide pork chops
How To Grill Pork Chops
Even in the realm of grilling there are a different methods you could use to cook pork chops. Sometimes I’m in the mood for a smoked pork chop. If you would like to read more about smoking pork chops, check out my recipe for Smoked Sweet And Spicy Pork Chops.

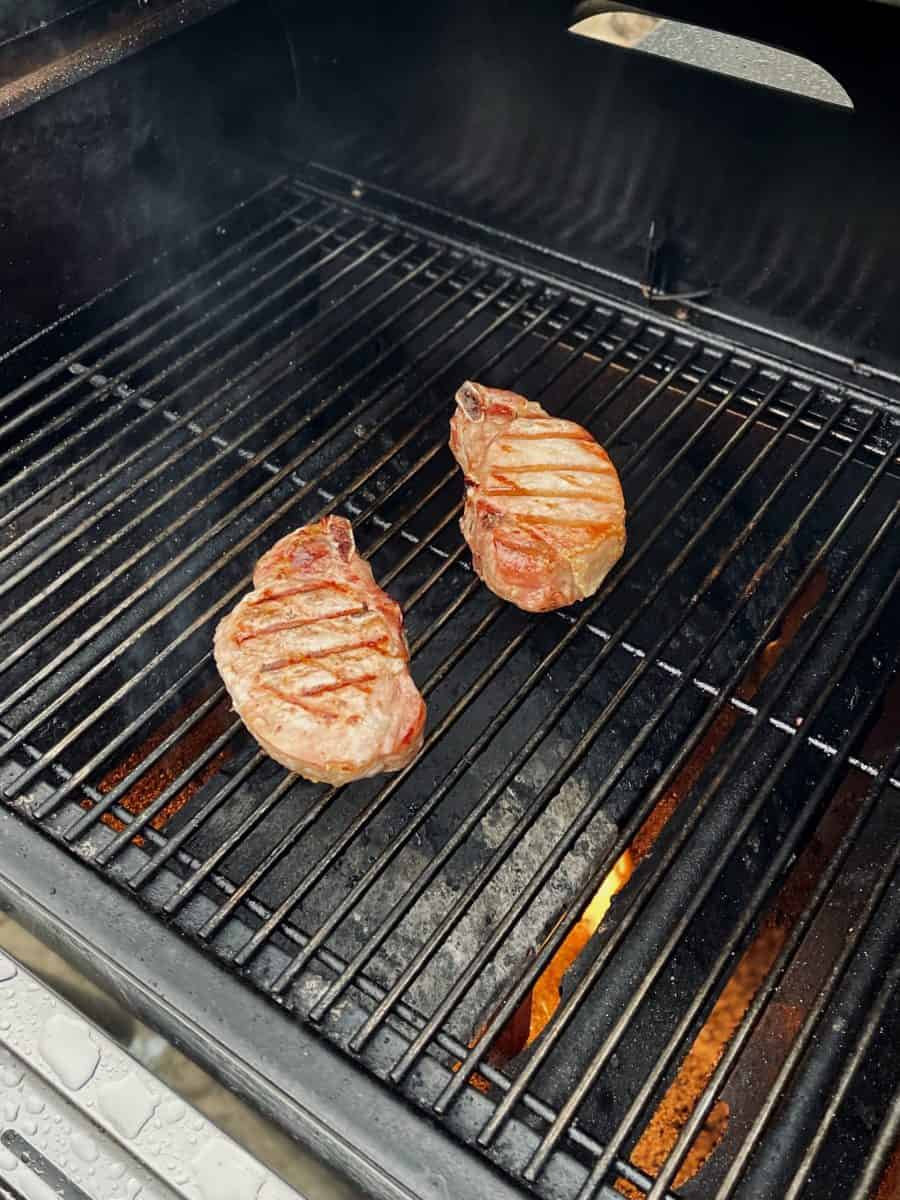
Direct Heat VS Indirect Heat : Basic Grilled Pork Chops
Having a direct and indirect zone when cooking thick pork chops or even steaks for that matter is helpful. Is is absolutely necessary? No. Consider this scenario however. You are grilling multiple things at once and you notice all of this sudden that your meat is cooked on the outside but not quite enough on the inside. The indirect zone or area gives you a safe place to put the meat where you can prevent the outside from further browning while allowing the inside of the chop to continue cooking.
If you decide instead to cook the pork chops over direct heat, it is helpful to flip the chops more frequently to cook them evenly. I like to sear the chops on both sides for a few minutes then periodically flip the chops until I’m near my target temperature of 145°F. I remove the chops even a few degrees under 145°F because after they rest for a few minutes, the temperature will rise to 145°F. Chops under 1 inch thick can be flipped once and just cooked to the proper temperature.
Kamado Grills And Pellet Grills
To create a direct and indirect zone on a kettle style grill, place the charcoal only one one side of the grill underneath the grill grate. Many kamado style grills have the option of having a half moon heat deflector that creates indirect heat on one side of the grill and direct on the other. On a gas or propane grill, light the grill on only one side to create two zone cooking.
On a pellet grill, two zone cooking in most cases isn’t possible as there isn’t a way to control the temperature to different areas of the grill. In this case, have an additional rack above the main cooking grate in case you need to slow down the cooking process.

Would you like to save this?
Clean Your Grill Grates Prior To Cooking
Clean your grill grates and give them a spray with non-stick cooking spray or wipe them down with a paper towel with a bit of oil on it. This will help prevent the pork chops from sticking to the grill grate.
Get Grilling
- Preheat the grill to medium-high (about 450°F)
- Pat the surface of the pork chops with a paper towel to remove any excess liquid
- Rub a little bit of cooking oil on both sides of the pork chops
- Season pork chops as desired
- Cook chops for a few minutes on each side until well browned or 3-5 minutes per side. (Time will vary depending on size of chops and temperature of grill)
- Move chops to cooler side of grill and continue to cook until internal temperature measures 145°F internally
- Remove from grill, let rest at least 5 minutes then serve
How To Cook Pork Chops On The Stove
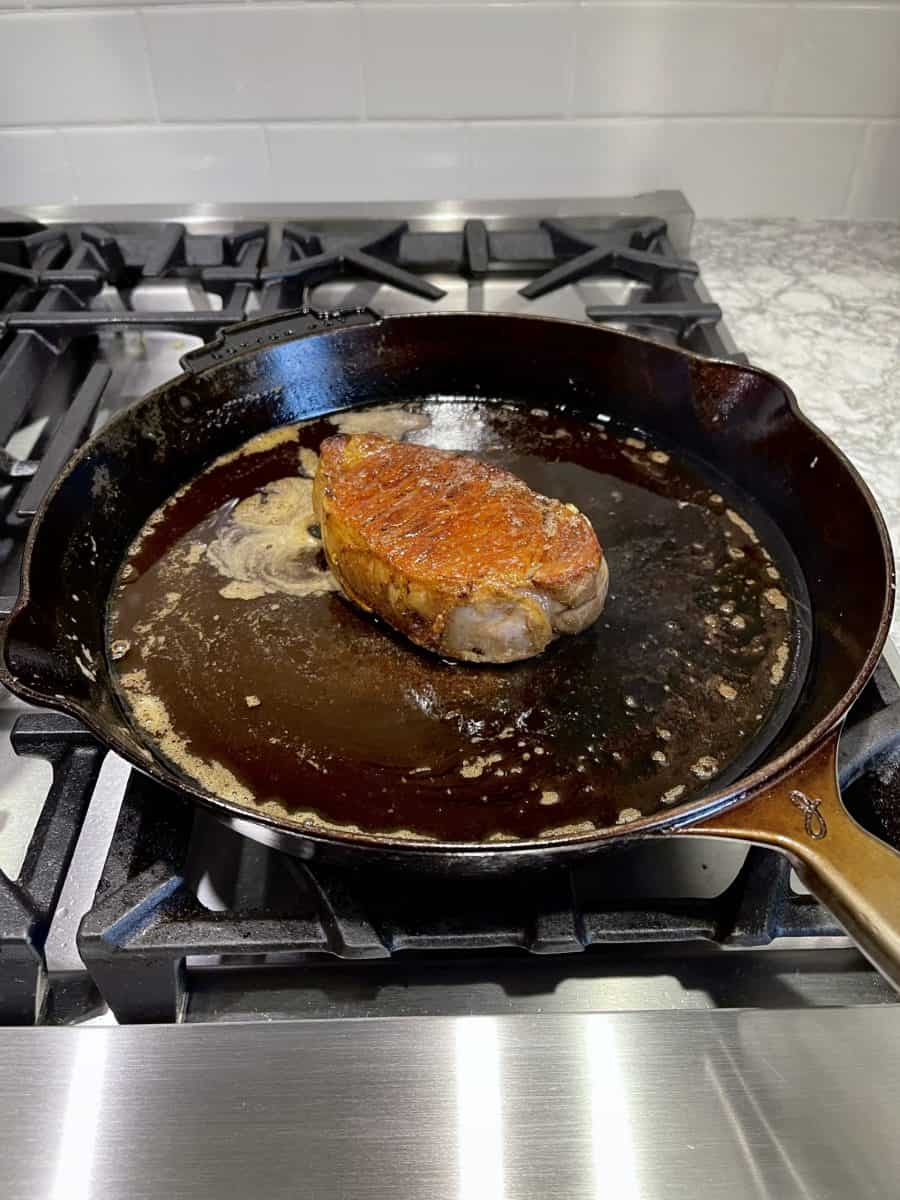
Pork Chop In Cast Iron
I am a big fan of cast iron cooking but I also realize that not everyone owns a cast iron pan or is comfortable using one. I love cast iron cooking because of the excellent heat retention, the even heat across the skillet surface, and it’s durability. Regardless if you are using cast iron or a non-cast iron skillet. The method is the same.

Pork Chop In Skillet (Non-Cast Iron)
If you are not using a cast iron skillet, my next preference for a skillet to cook a pork chop in would be stainless steel or carbon steel pan. A non-stick skillet is not ideal because it does not retain heat as well as cast iron or various steel pans. When you drop the pork chop in, the temperature of the pan will drop quickly and you will not get adequate browning. Stick to cast iron, stainless steel, or carbon steel for the best results.
How To Cook Pork Chops In The Oven
Finishing pork chops in the oven is great for a thicker chop which is 1 1/2 – 2 inches in thickness. Get a quick sear in a skillet on the stove then finish in the oven.
- Defrost pork chops if frozen. Preferred method is defrost in the refrigerator overnight.
- Pre-heat oven to 325-350°F
- Rub each side of pork chop with a little cooking oil then season as desired
- To get better flavor on the pork chops and nicer color, sear in a skillet on the stove on both sides first for a couple minutes, then transfer to the oven to finish
- Place pork chops on an elevated rack over a roasting pan
- Cook chops until they register 140°F on an instant read thermometer
- Remove from the oven, tent with foil and rest for 5 minutes prior to eating. After the rest the chops should be 145°F
- Total cooking time will vary depending on size of pork chop.
How to Broil Pork Chops
I’m not the biggest fan of broiling pork chops because of the potential mess it may make in my oven. If I’m being honest, I don’t believe I have broiled a pork chop since the 90s. But, that doesn’t mean you can’t. The joy of cooking is that you can use the method you prefer. If you do decide to broil your chops, using thinner pork chops would be easier. If using a thick chop, you would have to broil it on both sides then reduce the oven temperature and finish it traditionally in the oven until it registers about 140°F. Then remove the chops from the oven and rest for at least 5 minutes prior to serving.
To broil chops an inch or under: Preheat your broiler to high and place your chops on a broiler safe pan. Place the chops about 4 inches from the heat and broil on each side until nicely browned. Do not leave the kitchen during this process. Keep a close eye on the progress and browning of the chops. Remove chops from oven and let rest 5 minutes. Serve.
How To Sous Vide Pork Chops
Sous Vide is an increasingly popular technique for cooking a variety of proteins, vegetables, eggs and everything in between. Although the method of sous vide cooking has been around for many decades, it has become more mainstream as devices for the home cook have become available in the last few years. I will explain the method in its simplest form but you can read more about it here.
For those unfamiliar with the process, sous vide cooking utilizes a water bath that is set at a specific temperature and that specific temperature is maintained throughout the cook. The meat in this instance, is placed in a food safe plastic bag then seasoned and sealed. The bag is submerged so the meat is below the water level. The meat is then cooked at a consistent temperature for a certain length of time. Because the temperature of the water bath is consistent, the meat will never go above that temperature.
After the desired length of time cooking, the meat is removed from the bag then seared to finish at the end.
Advantages and Disadvantages of Sous Vide Cooking
I love this method because you can actually cook meat from frozen if desired in the instance you forget to defrost it. Another advantage is consistent results and it’s almost foolproof. Disadvantages include longer cook times and textural changes in meat if it is allowed to cook too long.

Please note, there are a large variety of ways and temperatures by which you can sous vide pork chops. This is my go to easy method and timing that produces great results.
- Set sous vide to make water bath 130°F.
- Bag pork chop(s) so that they do not overlap. Season as desired. I like kosher salt and pepper, a tablespoon of butter per bag and fresh herbs such as rosemary.
- For chops 1 inch or under in thickness, cook for 1 hour, for chops 1 1/2 inch cook for 1 1/2 hour, if 2 inches thick cook for 2 hours. NOTE: if you are cooking the chops from frozen, add 30 minutes of cook time to each time reference.
- Carefully remove chops from bag, pat dry with paper towel.
- Heat skillet to medium high heat then add oil with higher smoke point (canola, ghee, etc).
- Sear chops on both sides for a few minutes until nicely browned. Remove from pan when close to 145°F. Rest for 5 minutes then serve.
Once you know the basics of cooking pork chops you can venture into more complicated dishes. Sometimes I find pleasure in simplicity. A classically seasoned chop with just salt and pepper and perhaps the addition of some butter and herbs to finish is always a welcome meal in my home.